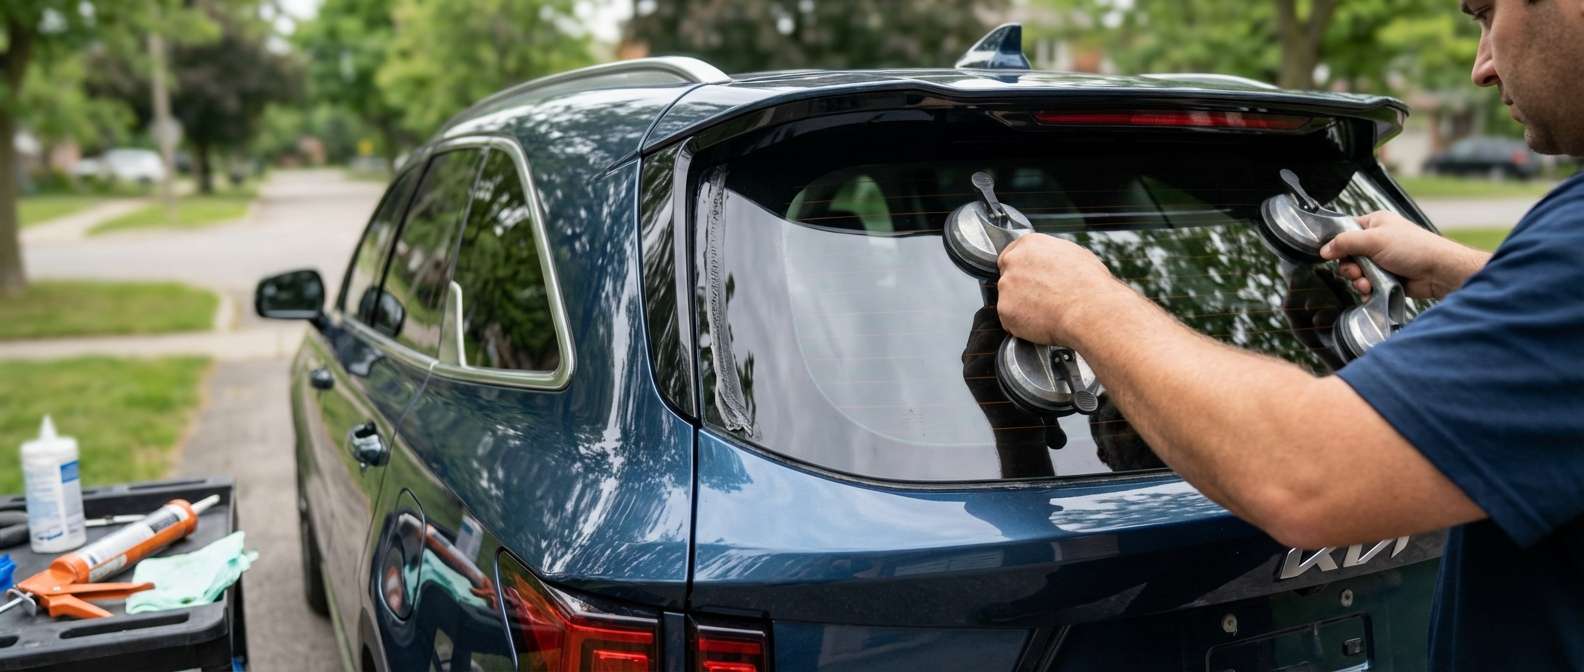
What to inspect on the replacement rear window before it goes in
Because the tailgate on this model does not use an external rubber moulding surround, the bare edge of the replacement back window sits flush against the painted liftgate frame. Before I set the replacement in, I match the edge profile against the original liftgate aperture to confirm clean alignment. The OEM part numbers (87110-R5001 and 87110-R5000) specify direct urethane bonding beneath a wide black ceramic frit band, which shields the adhesive bond line from ultraviolet degradation. When checking the replacement panel, that inner perimeter frit must be completely opaque, with no pinholes or thin patches near the upper corners where sunlight filters past the roof spoiler.
A distinct engineering detail on the MQ4 body is the absence of a wiper shaft hole through the bottom of the glass. Kia tucked the rear wiper assembly entirely beneath the rear upper roof spoiler, sweeping downward from above. A correct replacement pane must be solid tempered glass with no drilled holes at the lower edge. I also examine the factory privacy tint depth across the entire surface so it matches the rear quarter glass, along with the continuity of the integrated defroster grid lines and their soldered interior power tabs before anything is mounted.
Tailgate trim, hidden wiper, and spoiler clearance
Working on these tailgates means paying close attention to the components framing the glass. The upper liftgate spoiler hangs directly over the top glass edge, concealing both the hidden wiper mechanism and the rear washer fluid jet, alongside the center high-mount third brake light. That overhang leaves tight tolerances. The glass must sit at the exact factory depth so the upper spoiler does not rub against the glass surface during body flex, and the downward-sweeping wiper blade must maintain uniform contact across the top half of the window.
Inside the cabin, the snap-in surround mouldings and lower tailgate trim panels cover the electrical terminals for the defroster grid. I run a fully mobile service, travelling directly to your driveway or workplace parking spot anywhere across Toronto and the GTA to replace this liftgate glass on-site. Because this job involves clearing shattered tempered glass from inside the double-walled steel tailgate structure, the lower interior liftgate trim has to come off cleanly so no stray glass fragments interfere with the latch mechanism or the wiring running to the exterior backup camera mounted beneath the glass edge.
Post-replacement inspection checklist for the owner
Once the back glass is in place and the interior tailgate panels are reassembled, walk around the rear of the vehicle to check these specific points:
- Top spoiler gap: Look under the roof-mounted upper spoiler to ensure there is an even clearance gap across the entire top edge of the glass, with no contact against the third brake light housing.
- Wiper clearance and sweep: Turn on the rear wiper and verify that the arm drops smoothly from its hidden position beneath the spoiler without clipping the upper glass border or chattering.
- Washer jet aim: Test the rear washer spray to confirm fluid clears the top edge of the glass rather than spraying into the underside of the spoiler trim.
- Defroster grid operation: Turn on the rear defogger switch to confirm both left and right electrical spade connectors are live, heating the grid lines evenly across the privacy glass.
- Interior trim fit: Inspect the plastic interior surround pillars around the perimeter of the back window to confirm all clips are fully engaged and flush against the liftgate sheet metal.
- Rattle-free tailgate closure: Close the liftgate and listen for any loose glass debris within the lower tailgate shell or vibration around the exterior camera housing below the glass.





