Restoring the Sanctuary of Your 2022-2027 Infiniti QX60: Expert Vent Glass Replacement
The 2022-2027 Infiniti QX60 represents the pinnacle of modern luxury SUV design, offering a whisper-quiet cabin, opulent semi-aniline leather appointments, and sleek, aerodynamic exterior contours. However, when your vehicle suffers a shattered vent glass—whether due to an unfortunate break-in attempt, a rogue piece of highway debris, or severe weather—that meticulously engineered sanctuary is instantly compromised. A broken vent glass not only exposes your premium interior to the harsh Canadian elements but also creates a significant security vulnerability.
As a Master Auto Glass Technician and senior specialist at AlexWindshield, I have seen firsthand how easily a damaged side vent window can disrupt your daily routine. Many vehicle owners assume that because the vent glass is one of the smallest windows on the vehicle, it is the simplest to fix. In reality, replacing the vent glass on a highly sophisticated luxury SUV like the Infiniti QX60 requires exact precision, specialized tools, and a deep understanding of complex door anatomy. We are here to demystify this process and provide you with top-tier, precision-driven replacement services.
Why Immediate Vent Glass Replacement is Critical for Your QX60
Delaying the replacement of your Infiniti QX60 vent glass can lead to cascading issues that go far beyond a drafty cabin. Here is why immediate professional attention is required:
- Interior Protection: The QX60 features advanced door control modules, premium Bose audio speakers, and sensitive electronic window regulators. Moisture from rain or snow entering through a broken vent glass can short-circuit these expensive components.
- Security Risks: A shattered or temporarily taped-up vent window is an open invitation for opportunistic theft. Replacing it restores the structural integrity and security of your SUV.
- Acoustic Integrity: Infiniti engineers spend thousands of hours soundproofing the cabin. Only a perfectly sealed, high-quality replacement glass can restore the factory-level acoustic damping you expect from a luxury vehicle.
- Mechanical Safety: When a vent glass shatters, thousands of tiny, razor-sharp tempered glass fragments fall deep into the inner door cavity. If not professionally removed, these shards can grind against the main roll-up door glass, causing deep scratches or causing the window regulator motor to burn out.
Unmatched Mobile Auto Glass Services Across the Greater Toronto Area (GTA)
At AlexWindshield, we know that your time is incredibly valuable. Dealing with a broken window is already a massive inconvenience; you should not have to disrupt your schedule further by waiting in a repair shop waiting room. That is why we proudly offer fully equipped, premium mobile auto glass replacement services directly to your driveway, office parking lot, or garage.
We provide comprehensive coverage across the entire Greater Toronto Area (GTA). Whether you are commuting from your home in the expanding neighborhoods of Vaughan, working in the bustling business tech hubs of Markham, or running errands in the beautiful residential districts of Richmond Hill, our mobile fleet is ready to be dispatched to your exact location. We bring the auto glass shop to you, fully stocked with the premium materials, protective gear, and specialized tools required to service your 2022-2027 Infiniti QX60 flawlessly.
The Master Technician's Process: Step-by-Step Infiniti QX60 Vent Glass Replacement
When you hire AlexWindshield, you are not just getting a quick patch job; you are receiving a meticulous, factory-standard installation. Below is the detailed, step-by-step technical process I utilize to ensure your Infiniti QX60 vent glass replacement is executed perfectly from start to finish.
Step 1: Thorough Preparation and Interior Protection
Before any tools touch your vehicle, preparation is paramount. The Infiniti QX60 features highly refined interior materials that must be safeguarded. I begin by laying down thick, professional-grade protective drop cloths over the leather seats, center console, and floor mats. Next, I utilize a high-powered, HEPA-filtered shop vacuum to meticulously remove all visible broken glass shards from the seats, floorboards, and the immediate window frame. Safety glasses and cut-resistant Kevlar gloves are worn to protect against the hazardous tempered glass fragments.
Step 2: Precision Door Panel and Trim Removal
To access the internal mounting structure of the vent glass, the interior door panel must be carefully detached. Using specialized, non-marring nylon pry tools, I carefully remove the cosmetic trim pieces to expose the hidden retaining screws. Once the screws are extracted, I gently unclip the door panel from the frame, ensuring that the fragile plastic retaining clips are preserved. I then disconnect the wiring harnesses for the power windows, ambient lighting, and door locks. The vapor barrier is carefully peeled back to expose the inner door cavity, granting full access to the operational mechanisms.
Step 3: Internal Cavity Vacuuming and Removing the Old Glass
This is a step amateur technicians often skip, which leads to long-term damage. I insert flexible vacuum attachments deep into the bottom of the door cavity to suction out every last piece of shattered glass. I also clean out the window regulator tracks to ensure no microscopic shards remain to cause future binding or scratching of your main door glass. After the cavity is entirely clear, I remove the division bar (the vertical pillar separating the roll-up glass from the vent glass) and extract the remaining encapsulated frame of the broken vent glass.
Step 4: Advanced Surface Cleaning and Preparation
For the new vent glass to bond correctly and maintain a watertight seal, the mounting surface must be immaculately clean. I use specialized automotive glass scrapers to level the old factory polyurethane down to a base layer of 1-2 millimeters, creating an ideal bonding substrate. Next, the entire pinch-weld and surrounding frame are wiped down with an alcohol-based, lint-free chemical cleaner. This removes all dirt, grease, and microscopic debris that could compromise the final seal.
Step 5: Precision Primer Application
Once the surface is completely clean and dry, the priming phase begins. I apply a high-grade, fast-drying urethane primer to any exposed bare metal on the pinch-weld to prevent future rust and corrosion. I also apply a specialized glass primer to the ceramic frit band (the black painted edge) of the new premium replacement vent glass. This primer acts as a chemical bridge, ensuring maximum adhesion between the smooth glass surface and the structural adhesive.
Step 6: High-Quality Adhesive Application and Glass Installation
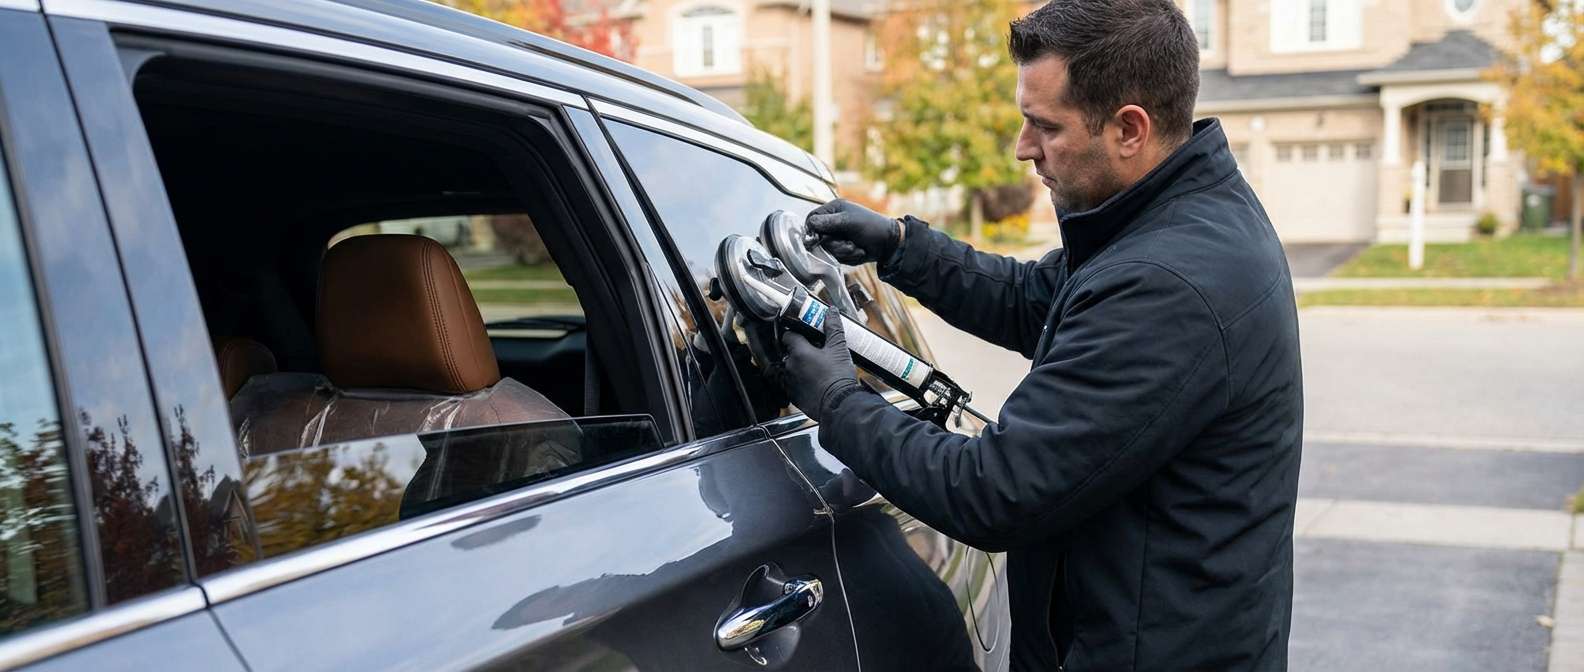
With the surfaces prepped and primed, I load a professional-grade caulking gun with an industry-leading, high-modulus, non-conductive polyurethane adhesive. I apply a consistent, precise V-bead of this high-quality adhesive along the mounting frame. Carefully, utilizing suction cups for absolute control, I guide the new vent glass into position. The glass is gently pressed into the adhesive, ensuring a uniform, factory-grade seal that eliminates any chance of wind noise or water leaks. The division bar is then securely bolted back into its original factory position.
Step 7: Complete Reassembly and Final Inspection
Once the glass is locked into place and the adhesive begins its rapid curing process, I initiate the reassembly phase. The vapor barrier is resealed perfectly to prevent drafts. All electronic wiring harnesses for the door controls are reconnected, and the interior door panel is snapped securely back into place without a single rattle. The hidden screws and cosmetic trim covers are reinstalled to factory spec. Finally, a secondary, exhaustive vacuuming of the entire cabin is performed, followed by a streak-free cleaning of your newly installed vent glass using premium automotive glass cleaner.
Why AlexWindshield is the Top Choice for Infiniti Owners in the GTA
Servicing a modern luxury vehicle like the 2022-2027 Infiniti QX60 requires specialized knowledge that goes beyond standard auto glass repair. At AlexWindshield, we pride ourselves on delivering a white-glove service that respects the engineering of your vehicle.
- Master Craftsmanship: Our technicians undergo rigorous, continuous training to stay updated on the latest automotive body and glass structures.
- Premium Materials: We use only OEE (Original Equipment Equivalent) or OEM (Original Equipment Manufacturer) glass, paired with the industry's strongest structural adhesives that meet or exceed federal safety standards.
- Total Convenience: Whether you are stranded with a broken window in a shopping center in Vaughan, your driveway in Markham, or your corporate office in Richmond Hill, our mobile units deliver seamless solutions on your schedule.
- Impeccable Cleanliness: We treat your vehicle as if it were our own. Our multi-stage glass vacuuming process guarantees that your interior is left spotless and safe for you and your family.
Secure Your Vehicle Today with the Experts at AlexWindshield
Do not let a shattered vent window compromise the security, comfort, and luxury of your highly prized SUV. Fast, reliable, and technically flawless auto glass replacement is just a phone call away. Trust the dedicated experts at AlexWindshield to restore your vehicle to its showroom glory.
As the leading mobile auto glass specialists in the Greater Toronto Area (GTA), we proudly back all of our workmanship with an industry-leading comprehensive Lifetime Warranty. This warranty guarantees that your new installation will be free from air leaks, water leaks, and manufacturer defects for as long as you own your vehicle. Experience the ultimate in automotive glass repair—contact AlexWindshield today to book your Infiniti QX60 vent glass replacement and get safely back on the road with total peace of mind!





