Reviving a Heavy-Duty Legend: Expert Back Glass Replacement for Your GMT800 Workhorse
The GMC Sierra HD 2500 and 3500 from 2001 to 2006, built on the legendary GMT800 platform, are universally recognized as some of the most resilient and reliable heavy-duty trucks ever manufactured. Featuring powerhouse engines like the 6.6L Duramax diesel and the 8.1L Vortec V8, these trucks were engineered to haul massive loads, conquer rugged job sites, and withstand the test of time. However, even the toughest truck on the road has a vulnerability: its auto glass. Whether it was a shifting payload in the truck bed, a stray rock on the highway, or an unfortunate break-in, a shattered rear window instantly compromises the security, weatherproofing, and structural integrity of your truck's cab. When disaster strikes your truck's rear window, you need a master technician who understands the exact specifications of this classic heavy-duty pickup.
At AlexWindshield, we specialize in precision back glass replacement for the GMC Sierra HD 2500/3500 2001-2006. We know that a work truck cannot afford to be off the road for long, and a poorly installed rear window will lead to disastrous water leaks, rust formation, and interior mold. As your dedicated auto glass experts, we deliver a flawless, factory-grade installation directly to your driveway, job site, or fleet yard.
Local Mobile Auto Glass Experts Across the Greater Toronto Area
Driving a heavy-duty truck with a shattered rear window exposes your interior to the unpredictable Canadian weather and leaves your valuable tools vulnerable to theft. You do not need to waste time driving to a traditional repair shop. AlexWindshield offers premium mobile auto glass services across the entire Greater Toronto Area (GTA). Our fully equipped mobile service vans bring the auto glass shop directly to you.
We provide rapid, reliable, and professional mobile service specifically tailored to the communities of Vaughan, Richmond Hill, and Markham, as well as the surrounding GTA regions. Whether you are parked at a residential driveway in Vaughan, a construction site in Markham, or an office complex in Richmond Hill, our master technicians arrive with the correct premium glass, specialized tools, and high-performance adhesives to get your GMC Sierra back in working order safely and efficiently.
Master Technician's A-Z Step-by-Step Back Glass Replacement Process
Replacing the back glass on a 2001-2006 GMC Sierra HD requires much more than simply slapping a new piece of glass onto the truck. Depending on whether your truck is a Regular Cab, Extended Cab, or Crew Cab, and whether it features a solid piece of glass or a manual sliding rear window, the structural approach remains technically rigorous. Here is our uncompromising, step-by-step master technician process to ensure a perfect, leak-proof replacement.
Step 1: Complete Interior Protection and Work Area Preparation
Before we even touch a tool, our priority is protecting the interior of your GMC Sierra. We begin by laying down heavy-duty protective drop cloths over your truck's seats, center console, and rear floorboards. We also drape protective padding over the truck bed nearest the cab to prevent any scratches to your vehicle's paint during the extraction and installation process. Proper preparation is the hallmark of a professional auto glass replacement.
Step 2: Interior Trim Panel Removal and Exhaustive Shard Vacuuming
Because we are dealing with a shattered back glass replacement, safety and cleanliness are paramount. Tempered rear truck glass explodes into thousands of tiny, sharp cubes that find their way into every conceivable crevice of the cab. We do not just sweep up the visible pieces.
- Panel Removal: We carefully unclip and remove the rear interior trim panels, upper headliner molding, and C-pillar trim pieces. On Extended and Crew Cab models, this often involves unbolting and folding down the rear bench seat to access the lower window channel.
- Deep Extraction Vacuuming: Using high-powered, industrial-grade shop vacuums, we extract every single shard of broken glass from the vehicle's interior. We vacuum inside the door panels (if shards traveled), deep inside the seat crevices, beneath the rear carpeting, and out of the rear structural channels of the cab. We also sweep and vacuum the truck bed. Leaving broken glass behind is unacceptable; our goal is to return your cab to a pristine, safe condition.
Step 3: Precision Removal of the Old Glass and Frame
With the interior stripped of trim and cleared of hazardous glass shards, we focus on removing the remaining glass attached to the vehicle. The 2001-2006 Sierra HD rear windows are heavily bonded to the cab's steel frame using factory urethane.
- We utilize specialized cold knives, automated wire-cutting tools, or powered urethane extractors to slice through the dense bead of old adhesive securing the remnants of the rear window.
- We work meticulously along the top, sides, and bottom of the rear cab opening, ensuring that our cutting blades never scratch the painted metal frame, which could lead to severe rust issues down the line.
- Once the adhesive is cut, we carefully lift away the remaining outer glass frame and any lingering chunks of broken glass safely away from the truck.
Step 4: Pinch Weld Preparation and Surface Cleaning
The structural integrity of your new truck back glass depends entirely on the preparation of the pinch weld (the metal frame where the glass sits). As a master technician, I consider this the most critical phase of the replacement.
- Using specially designed razor scrapers, we pare down the old urethane bead to a completely flat, thin layer (about 1-2 millimeters). New urethane bonds best to a clean, tightly adhered layer of old urethane.
- We then use a specialized, alcohol-based auto glass cleaner to thoroughly scrub the pinch weld and the surrounding metal. This removes all dirt, dust, old road grime, and chemical residues that have accumulated behind the cab over the last two decades.
Step 5: Chemical Primer Application and Rust Prevention
The 2001-2006 GMC Sierra HD trucks are notorious for eventually developing rust if the cab seams are not protected. We take absolute zero chances with corrosion.
- We carefully inspect the bare metal of the pinch weld. If there are any micro-scratches from the cutting process, we apply a high-grade auto glass primer to the exposed steel.
- This specialized black primer serves a dual purpose: it acts as a robust anti-corrosion barrier to prevent rust from forming, and it acts as an aggressive chemical adhesion promoter for the new urethane.
- We also apply a specific glass primer to the frit band (the black painted edge) of the brand-new rear glass to ensure a permanent chemical cross-link between the glass, the urethane, and the truck cab.
Step 6: High-Quality Urethane Adhesive Application
With both the truck cab and the new replacement glass primed and ready, it is time to apply the bonding agent. At AlexWindshield, we exclusively use premium, OEM-certified, fast-curing polyurethane adhesives.
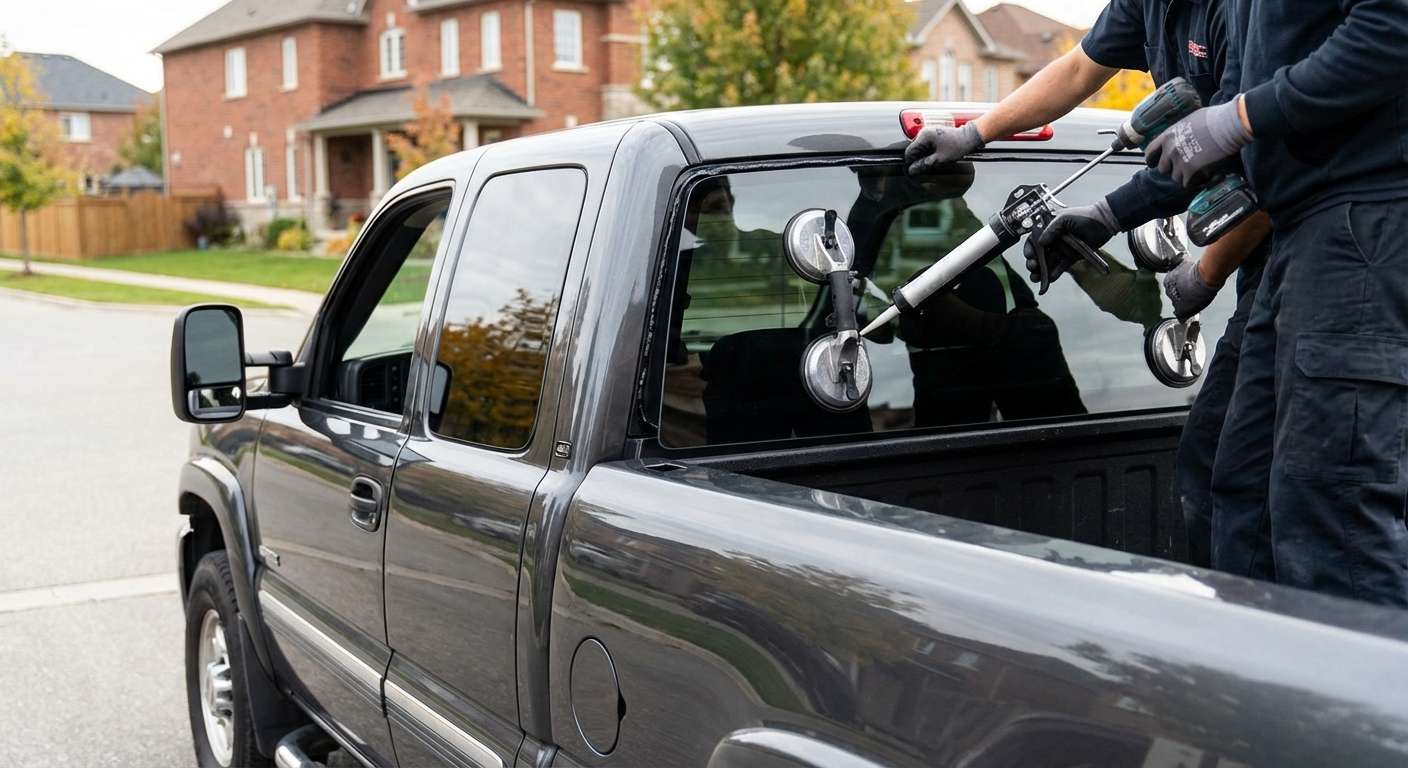
- Using a battery-powered heavy-duty caulking gun, we lay down a continuous, perfectly uniform "V-bead" of high-quality adhesive along the entire perimeter of the pinch weld.
- The V-shape is crucial; as the glass is pressed into place, the peak of the V collapses evenly, spreading the adhesive perfectly without any gaps, air pockets, or thin spots. This is the secret to a completely waterproof and wind-noise-free seal.
Step 7: Precision Glass Installation and Curing Process
Now, the new back glass—whether it is a solid tempered pane or a multi-panel manual slider specifically manufactured for the GMT800 Sierra HD—is carefully lifted into position.
- Using specialized suction cups, two technicians gently lower the glass onto the wet urethane bead, ensuring perfect vertical and horizontal alignment with the truck's cab lines.
- Firm, even pressure is applied around the entire perimeter to seat the glass deeply into the adhesive.
- We immediately re-install the interior trim pieces, re-secure the headliner molding, and bolt the rear seats back into their factory positions.
- We inform the customer of the Safe Drive-Away Time (SDAT). Because we use advanced fast-cure urethane, your heavy-duty Sierra is typically safe to drive within 30 to 60 minutes after the glass is set, allowing the adhesive to flash and lock the structural integrity of the cab back into place.
Quality Assurance and Unmatched Warranty
After the installation is complete, we perform a rigorous quality assurance check. We clean the new back glass to a streak-free shine, test the functionality of the sliding window mechanism (if applicable), and ensure all interior trims are perfectly aligned. We make sure your 2001-2006 GMC Sierra HD looks as aggressive and put-together as the day it rolled off the assembly line. Because these trucks are heavily utilized in the trades, we know that a failing window seal is not an option.
When you choose AlexWindshield, you are choosing peace of mind. As the premier mobile auto glass specialists serving the Greater Toronto Area (GTA), including Vaughan, Richmond Hill, and Markham, we stand behind our master craftsmanship. We back every single installation with a comprehensive Lifetime Warranty against leaks, wind noise, and manufacturer defects. Your truck works hard for you; let us work hard to keep it protected. Contact AlexWindshield today to schedule your GMC Sierra HD back glass replacement and experience the highest standard of auto glass service in Ontario.





