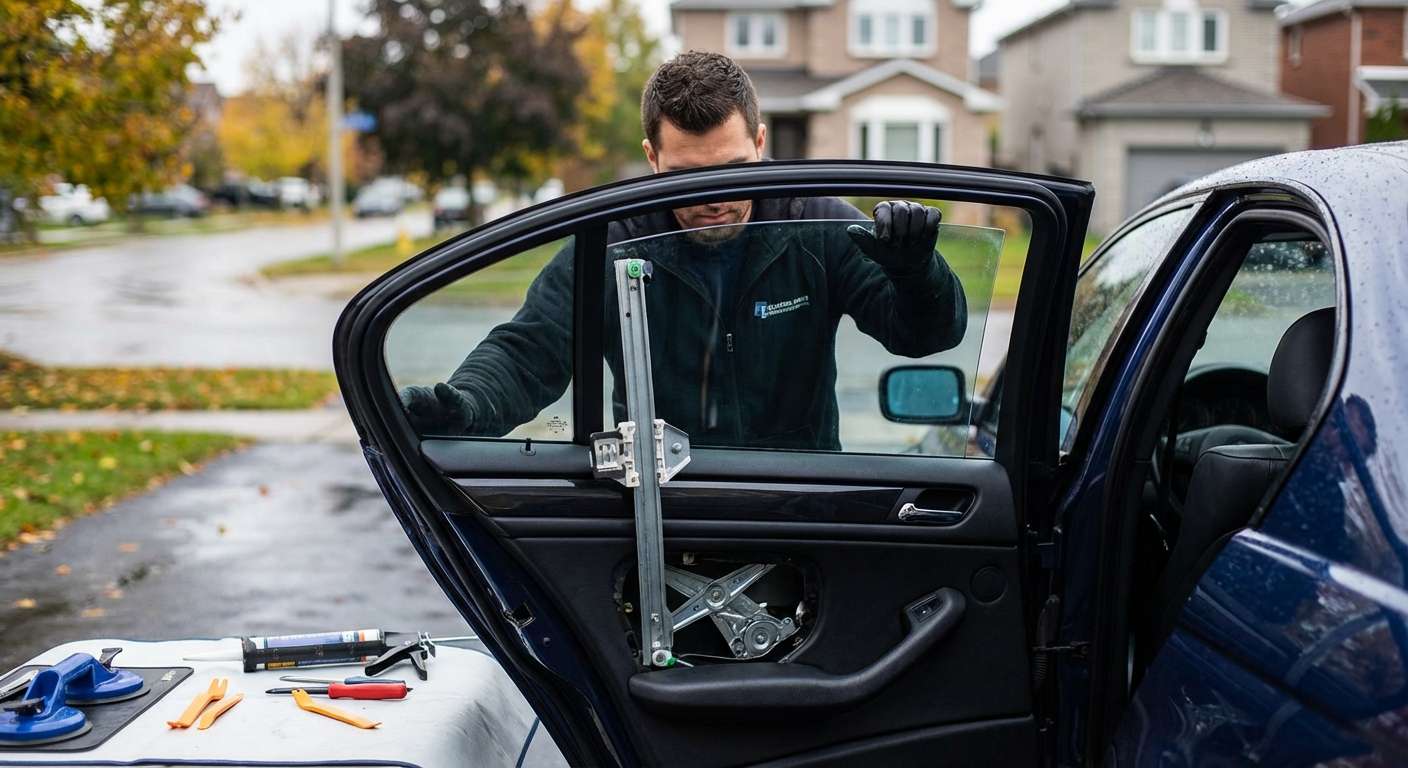
Restoring the Icon: Vent Glass Replacement for BMW 3 Series (E46) 1999-2005
The BMW 3 Series (E46), produced between 1999 and 2005, is widely regarded by enthusiasts and mechanics alike as one of the finest chassis ever engineered in Bavaria. It represents the quintessential "Ultimate Driving Machine," blending analog steering feedback with timeless aesthetics. However, owning a modern classic comes with the responsibility of maintenance, and unfortunately, the reality of vandalism or road debris. A broken vent glass—that small, triangular window located in the rear door frame—does more than just ruin the sleek silhouette of your E46; it compromises the vehicle's security and exposes the refined interior to the harsh Canadian elements.
At AlexWindshield, we understand that an E46 is not just a car; it is a piece of automotive history. Whether you drive a 323i, 325i, 330i, or the legendary M3, replacing the vent glass requires a level of precision that generalist shops often lack. Unlike a standard windshield replacement, swapping out the rear door vent glass on a BMW E46 involves intricate mechanical disassembly, careful handling of aged interior trim, and precise glass alignment. Serving the entire Greater Toronto Area (GTA), with a specialized focus on Vaughan, Richmond Hill, and Markham, our mobile technicians bring factory-level expertise directly to your driveway.
Why Vent Glass Replacement is Complex on the BMW E46
Many vehicle owners assume that because the vent glass is smaller than the main door window, it should be easier and cheaper to replace. In reality, the opposite is often true, especially for German engineering from the early 2000s. The vent glass on the BMW 3 Series E46 is integrated into the rear door's structural framework, separated from the roll-down window by a vertical guide rail (often referred to as the division bar).
To replace this glass correctly, one cannot simply "pop" a new piece in. It requires the partial dismantling of the window regulator system and the removal of the division bar to create enough clearance for the new glass to seat into the rubber run channel. Furthermore, because the E46 is now a classic vehicle, the plastic interior clips and vapor barriers have aged. An inexperienced technician can easily snap brittle door panel clips or tear the weatherproofing liner, leading to rattles and water leaks inside the cabin. At AlexWindshield, we treat your vehicle with the delicate touch it requires, using specialized tools to preserve the integrity of your interior.
Our Service Areas: Mobile Auto Glass in the GTA
We know that driving a BMW with a shattered window is stressful and unsafe. You shouldn't have to drive across town with wind and rain entering your cabin. AlexWindshield offers a premium mobile auto glass service that comes to you. We are deeply embedded in the local community, providing rapid response times to:
- Vaughan: From Woodbridge to Maple, our technicians can perform complex glass replacements in your office parking lot or home garage.
- Richmond Hill: We service all neighborhoods along Yonge Street and Bayview Avenue, ensuring your E46 is secure again.
- Markham: Whether you are in Unionville or near Markville, we bring the shop to you.
- Greater Toronto Area: Our service radius covers the entire metro area, ensuring no BMW owner is left stranded.
Step-by-Step Technical Process: BMW E46 Vent Glass Replacement
As Master Technicians, we follow a rigorous protocol that adheres to both BMW factory standards and the Auto Glass Safety Council (AGSC) guidelines. Below is the detailed, A-to-Z process we utilize when replacing the rear door vent glass on your 1999-2005 BMW 3 Series.
Phase 1: Vehicle Assessment and Interior Protection
Before touching a single tool, we perform a pre-inspection of the vehicle. We check the operation of the main power window regulator and the door lock actuator to ensure no pre-existing mechanical faults exist. Once cleared, we proceed to protection:
- We apply protective tape to the exterior door paint to prevent scratches from falling glass or tools.
- The interior leather seats and floor mats are covered with heavy-duty protective covers.
- Safety First: We ensure the vehicle is parked on a level surface to facilitate precise glass alignment.
Phase 2: Door Panel Removal and Debris Management
Unlike a windshield replacement, side glass replacement necessitates access to the inner workings of the door. This is a critical step where attention to detail is paramount.
- Trim Removal: We carefully pry off the decorative wood or aluminum trim strip on the door panel to reveal the hidden Torx screws. We also remove the cover behind the interior door handle.
- Panel Separation: Using a non-marring pry tool, we pop the perimeter clips of the door card. On an E46, these clips are prone to breaking; we carry replacement OEM clips to ensure the panel goes back on tight.
- Cable Disconnection: We disconnect the Bowden cable (door handle release) and the wiring harness for the speaker and window switch.
- Vapor Barrier Removal: We carefully peel back the foam vapor barrier. This barrier is sealed with butyl tape and is critical for preventing water from entering the footwell. We preserve this seal meticulously.
Phase 3: Vacuuming and Shard Removal
When tempered glass breaks, it explodes into thousands of tiny cubes. These shards fall deep into the door shell, where they can rattle or jam the window regulator and drain holes.
- We use a high-powered industrial vacuum with a flexible crevice tool to reach the bottom of the door shell.
- Drain Hole Cleaning: We specifically check the water drain holes at the bottom of the door to ensure no glass is blocking them. Blocked drains can cause rust and electrical failure in the future.
- We vacuum the carpets, seats, and any crevices where glass may have flown during the breakage.
Phase 4: Disassembly of the Window Guide Rail
This is the most technical part of the E46 vent glass replacement. The vent glass is held in place by the rubber weatherstrip and the vertical division bar.
- Lowering the Main Window: We lower the main door glass to the bottom position to create workspace.
- removing Run Channel: We pull the rubber window run channel out of the top and sides of the door frame.
- Releasing the Guide Rail: There are specific bolts (usually 10mm or T30 Torx) located at the top of the door frame (under the rubber seal) and at the bottom of the door shell holding the vertical division bar. We remove these bolts.
- Shifting the Bar: We carefully manipulate the division bar, sliding it forward or tilting it to release the tension on the remaining fragments of the old vent glass.
Phase 5: Surface Preparation and Primer Application
Even though vent glass is often mechanically held by seals, modern replacement procedures and certain E46 body styles (depending on the specific trim or aftermarket glass tolerances) may require urethane bonding for added stability and leak prevention.
- Cleaning the Frame: We clean the metal pinch weld and the rubber gaskets using a specialized degreaser to remove dirt, old adhesive, and road grime.
- Activator Application: We apply a Sika Aktivator to the glass ceramic band (the black edge) and the vehicle frame to prepare the surfaces for bonding.
- Primer Application: If the glass requires bonding to the vertical bar or frame, we apply a high-quality black primer to the pinch weld. This prevents rust and protects the urethane from UV degradation. This step is non-negotiable for a long-lasting repair.
Phase 6: Installation of the New Vent Glass
With the frame prepped and the division bar loose, we are ready to install the new unit.
- Seating the Glass: We insert the new vent glass into the rear position of the door frame, carefully aligning it with the rubber gasket.
- Realigning the Division Bar: We slide the vertical guide rail back into position. This sandwiches the new vent glass between the rear of the door frame and the guide rail.
- Securing the Hardware: We reinstall the mounting bolts for the guide rail. We hand-tighten them first to allow for minor adjustments, ensuring the main window can slide up and down without binding. Once aligned, we torque the bolts to factory specifications.
- Reinstalling Run Channel: The rubber run channel for the main window is pressed back into place.
Phase 7: Reassembly and Final Testing
The job isn't done until the car looks untouched.
- Vapor Barrier Reseal: We re-adhere the foam vapor barrier. If the butyl tape has lost tackiness, we apply fresh butyl to ensure a waterproof seal.
- Door Panel Installation: We reconnect the speakers, window switch, and door handle cable. The door panel is snapped back onto the frame using the clips, and all Torx screws are tightened.
- Operational Check: We test the main window functionality (auto-up and auto-down) to ensure the guide rail alignment is perfect. We also check the door locks and handles.
- Glass Cleaning: The new glass and the interior panel are cleaned with ammonia-free glass cleaner to remove any fingerprints.
Why Choose AlexWindshield for Your BMW?
Your BMW E46 deserves more than a quick fix; it deserves the care of a Master Technician. At AlexWindshield, we pride ourselves on transparency, quality, and convenience. We do not cut corners on preparation or the quality of materials used. From the high-modulus urethane adhesive to the OEM-quality replacement glass, every component is chosen to match the high standards of German engineering.
We stand behind our craftsmanship with a Lifetime Warranty on leakage and workmanship. This means as long as you own your vehicle, you are protected against wind noise, water leaks, or loose moldings resulting from our installation.
Ready to Secure Your Vehicle?
Don't let a broken vent glass compromise the safety and look of your BMW. Trust the local experts in the GTA. Whether you are in Vaughan, Richmond Hill, or Markham, we are ready to serve you.
Contact AlexWindshield today to schedule your mobile appointment. Restore your E46 to its former glory with the precision and care it deserves.





